
Is your plant wilting despite wet soil? Learn how to spot, fix, and prevent waterlogged pots during the monsoon before root rot takes over.
| Symptom | Cause | Immediate Action |
|---|---|---|
| Wilting despite wet soil | Root oxygen deprivation | Elevate pot, clear drainage hole, aerate soil |
| Yellow leaves during rain | Root rot beginning | Remove affected leaves, improve drainage, apply neem drench |
| Sour or sulphurous smell | Anaerobic decomposition | Aerate soil, apply dry coco coir surface layer, repot if severe |
| Standing water on soil | Blocked drainage or compaction | Clear holes, add drainage holes, switch to a grow bag |
| Stem blackening at the base | Advanced root rot | Repot immediately, do not delay |
| Green algae on the soil surface | Persistent waterlogging | Improve drainage, reduce watering entirely |
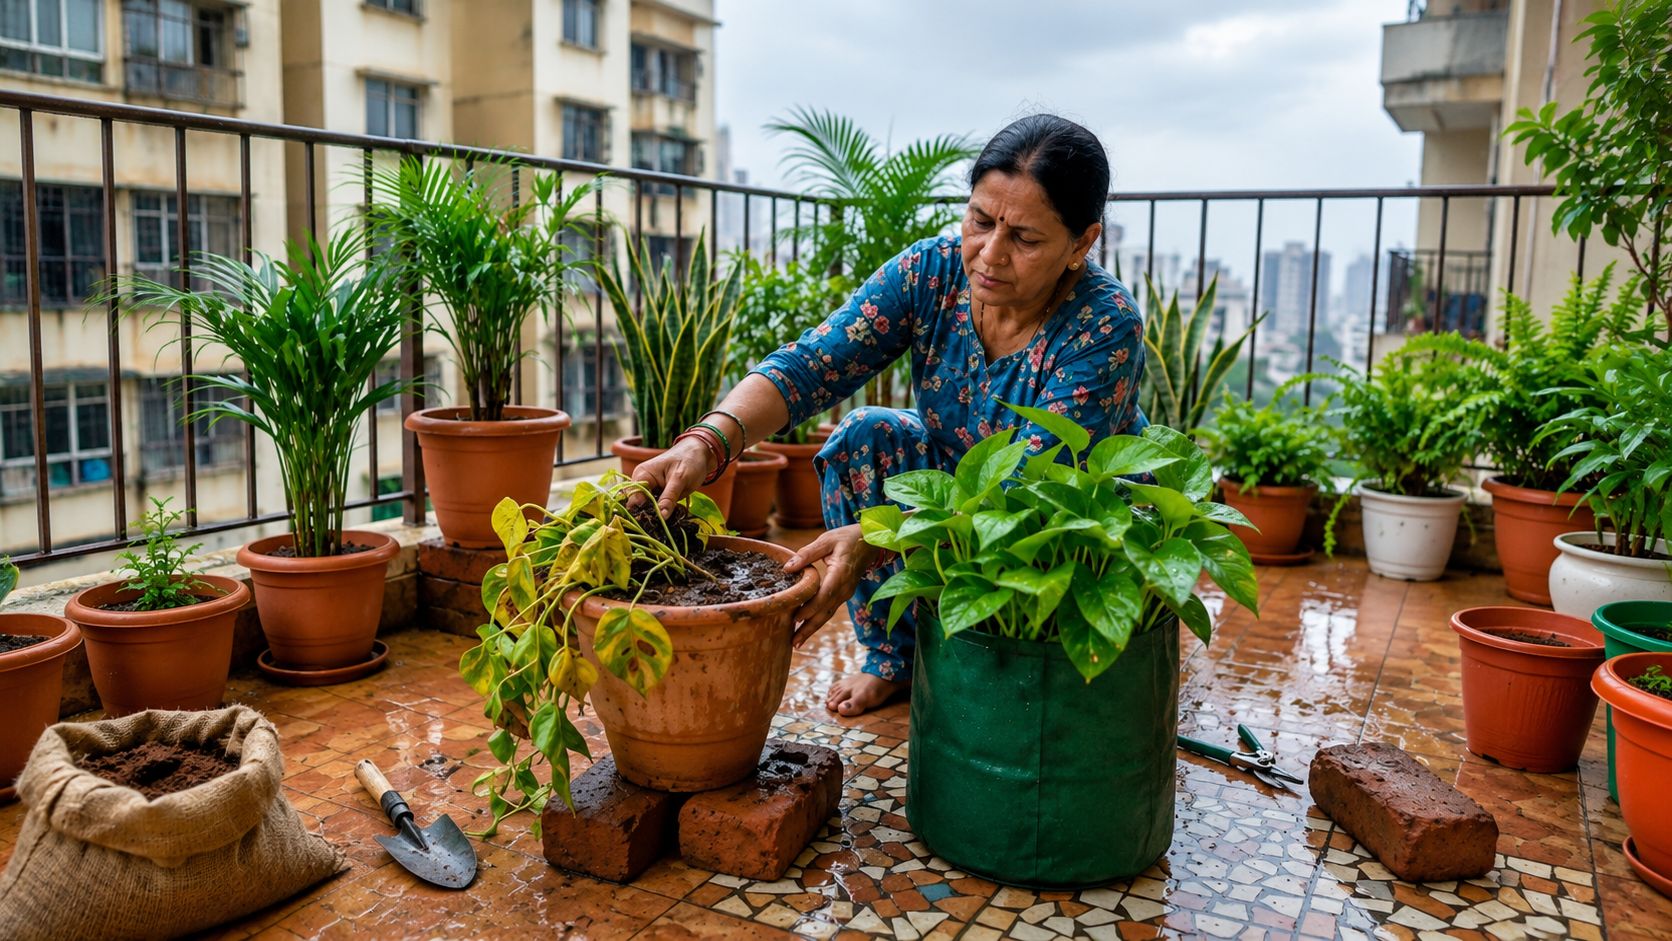
Monsoon is here, and your balcony plants are enjoying the rain. But if a plant looks droopy even when the soil is wet, or the pot smells sour, there may be a problem. These are the common signs of waterlogged soil, a condition known as waterlogging. This condition occurs when excess water gets trapped in the pot and cannot drain properly. If left unchecked, waterlogging can damage roots, slow plant growth, and lead to root rot. The good news is that you can spot the signs early and often save the plant.
In this guide, you'll learn how to identify waterlogged soil, rescue affected plants, and prevent the problem during heavy rains.
💧 Quick Symptom Checker: Not sure whether your plant is suffering from waterlogging? Use the quick symptom checker below to identify the warning signs and take action before the damage becomes severe.

Signs Your Pot Soil Is Waterlogged
Before adding fertilizer or moving your plant, check for these common signs of waterlogging.
Early Warning Signs (Within 24–48 Hours of Heavy Rain):
- Plant looks droopy even though the soil is wet
- Lower leaves start turning yellow
- Growth slows down or stops
- Water stays on the soil surface after watering or rain
Advanced Signs (3–7 Days of Waterlogging):
- Soil smells sour or rotten
- Stem base becomes soft or dark
- Leaves fall off unexpectedly
- Green algae appear on the soil surface
- Pot remains very heavy for several days
Root-Level Confirmation:
Push a pencil or wooden stick into the soil and pull it out. If it comes out coated in wet, smelly mud, the soil is holding too much water. You can also check the drainage hole. If water suddenly pours out when you tilt the pot, the drainage may be blocked.
If you notice multiple signs, it's time to act before root damage becomes severe.
Emergency Rescue: What to Do in the Next 24 Hours

If you notice signs of waterlogging, act as soon as possible. Here are the steps to take within the next 24 hours:
Step 1: Stop Adding Water
This may sound obvious, but many gardeners continue watering on a fixed schedule even when it has been raining. During the monsoon, avoid watering unless the soil feels dry about 5 cm below the surface when you check with your finger.
Step 2: Move the Pot to Shelter
Move the pot away from open areas and place it under a balcony roof, overhang, or any sheltered spot. This prevents more rain from soaking the soil while you fix the drainage problem. Avoid placing the plant in harsh direct sunlight, as a stressed plant may struggle with the sudden heat.
Step 3: Lift it off the Ground
If the pot is sitting directly on concrete, the drainage hole may not get enough airflow. Place the pot on bricks, stones, or a plant stand to create a gap of about 5–8 cm underneath. In many cases, trapped water will start draining once the pot is raised.
Step 4: Clear the Drainage Hole
Lay the pot gently on its side and check the drainage hole. Mud, roots, or debris can block it and prevent water from escaping. Use a stick, pencil, or screwdriver to remove the blockage carefully. If the pot has only one small drainage hole, consider adding two or three more holes near the base.
Step 5: Empty the Saucer
If your pot sits in a saucer or tray, remove it during the monsoon. Water collected in the saucer keeps the bottom of the soil constantly wet. This increases the risk of root rot and slows down the drying process.
Step-by-Step Fix for Waterlogged Pots

Once you've done the emergency steps, work through these in order:
Fix 1: Aerate the Soil Without Disturbing Roots
Take a chopstick, bamboo skewer, or fork. Push it into the soil around the outer edge of the pot, keeping it away from the stem and main roots. Make holes about 10–12 cm deep and gently move the tool to widen them slightly. Repeat this every 3–4 cm around the plant.
These holes help air reach the roots and allow trapped water to drain more easily. The goal is not to mix the soil but to create small channels for air flow and water movement.
Fix 2: The Wick Trick (For Severely Waterlogged Pots)
Roll a strip of cotton cloth, thick paper towel, or newspaper into a tight tube about 2 cm thick. Push one end deep into the soil near the centre of the pot and let the other end hang over the rim.
The material will slowly pull excess moisture out of the soil. Replace it after 6–8 hours if the soil is still very wet. This method works well for large pots that are difficult to lift or move.
Fix 3: Surface Absorption
Spread a 2–3 cm layer of dry coco coir, dry vermicompost, or newspaper on top of the soil. This helps soak up excess moisture from the surface. It also reduces soil splashing during rain, which can spread fungal diseases onto the leaves.
Fix 4: Prune Damaged Foliage
Use clean scissors or pruning shears to remove leaves that are yellow, soft, mushy, or covered with dark spots. These leaves will not recover and will continue using the plant's energy. Removing them helps the plant focus on repairing its roots and producing healthy new growth.
If you notice signs of fungal infection, clean your scissors with diluted neem oil or isopropyl alcohol between cuts to prevent the infection from spreading.
Fix 5: Apply Organic Fungicide
Waterlogged roots are more likely to develop fungal diseases during the monsoon. Mix 5 ml of neem oil with 1 litre of water and add 2–3 drops of dish soap. Apply the mixture lightly to the soil. This helps protect the roots from fungal infections while preserving beneficial soil microbes.
When to Repot: Severe Damage Protocol
If your plant has been sitting in waterlogged soil for more than 3 days and the base of the stem has turned black or soft, or the soil still smells bad even after aerating, it's time to repot. Don't worry too much about transplant shock. A plant left in waterlogged soil is more likely to suffer further damage.
How to Repot a Waterlogged Plant

Step 1: Bare-Root the Plant
Carefully take the plant out of its pot. Place the root ball on newspaper or dry cardboard and leave it for 30–60 minutes to allow excess moisture to drain.
Step 2: Wash the Roots
Rinse the roots gently with clean water to remove the old wet soil. This makes it easier to check the condition of the roots.
Step 3: Prune Damaged Roots
Healthy roots are white or light brown and feel firm. Damaged roots are dark, soft, or mushy. Trim away all damaged roots using clean, sharp scissors. Keep cutting until you reach healthy root tissue.
Step 4: Let the Roots Dry Briefly
Place the plant in a shaded area and let the roots air-dry for 1–2 hours. This helps the cut areas dry before repotting.
Step 5: Prepare a Fresh, Well-Draining Mix
Do not reuse the old waterlogged soil. Fill the pot with a fresh, well-draining potting mix.
Step 6: Repot Into a Clean Container
Plant it in a clean container with several drainage holes. Place the pot on a stand or bricks to improve drainage and airflow underneath.
Step 7: No Fertilizer for 3 Weeks
Do not apply fertilizer right away. The roots need time to recover. Wait until you see healthy new growth, then start with a mild liquid seaweed feed or compost tea.
Grow Bags Vs. Plastic Pots: Which is Better During Monsoon?
To help you decide, here is the visual infographic showing the difference between the grow bags and plastic pots:
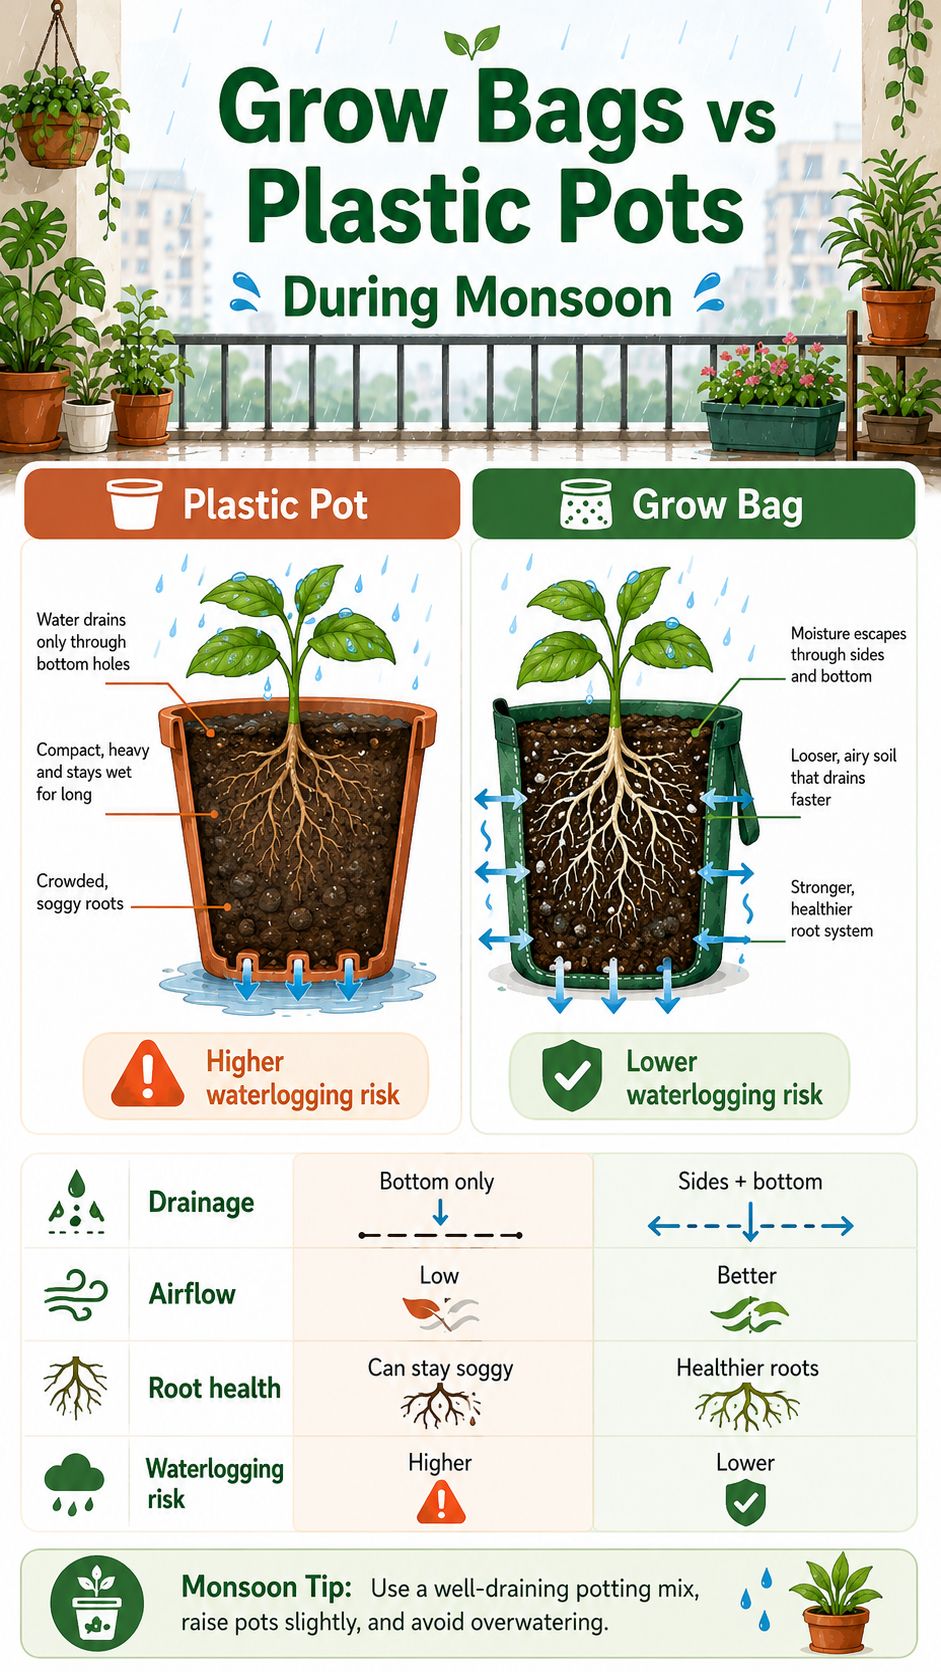
If you are an Indian balcony gardener, grow bags can be a better option during the monsoon.
Here is why:
- Grow bags are made from breathable fabric that allows air circulation and lets excess moisture escape from the sides.
- Plastic or ceramic pots only drain from the bottom, which can lead to longer moisture retention after heavy rains.
- The breathable structure of grow bags helps soil dry faster, reducing the risk of waterlogging and root rot.
- Grow bags also promote healthier root growth by encouraging branching instead of root circling, which is common in plastic pots.
Practical Grow Bag Size Guide for Monsoon
- Herbs and small flowering plants: 6×6 inch or 8×8 inch grow bags
- Vegetables such as tomato, chili, brinjal, etc.: 12×12 inch or 18×18 inch grow bags
- Larger shrubs and flowering plants: 18×18-inch or 24×24-inch grow bags
If you're not ready to switch all your plants, consider moving those that are most sensitive to excess moisture, such as succulents, herbs, and small flowering plants, into grow bags before the peak monsoon months of July and August.
Monsoon Potting Mix: The Right Formula

The potting mix is just as important as the container. Regular garden soil is usually too heavy for pots during the monsoon. It becomes compact, reduces airflow around the roots, and holds excess water for longer.
A simple potting mix for the rainy season is:
| Ingredient | Proportion | Purpose |
|---|---|---|
| Good quality potting soil | 40% | Provides structure and nutrients |
| Coarse river sand or perlite | 20% | Improves drainage |
| Cocopeat | 20% | Holds moisture while keeping the soil airy |
| Vermicompost or mature compost | 15% | Supplies nutrients and beneficial microbes |
| Neem cake powder | 5% | Helps protect roots from pests and fungal problems |
Mix all the ingredients well before filling your pot or grow bag. The final mix should feel light and loose, not heavy or sticky. When you pour water on it, the water should drain through quickly instead of sitting on the surface.
Common Waterlogging Mistakes You Should Avoid
-
Do Not Add Pebbles or Stones at the Bottom
Adding pebbles, gravel, or broken pottery at the bottom of a pot does not improve drainage. In fact, water can collect above the stone layer, keeping the root zone wetter for longer.
Instead, use a well-draining potting mix throughout the container and ensure the pot has adequate drainage holes.
-
Do Not Fertilize a Waterlogged Plant
Waterlogged roots cannot absorb nutrients properly. Adding fertilizer, especially chemical fertilizers, can further damage stressed roots. Wait until you see healthy new growth, then feed the plant with a balanced fertilizer to support recovery and future growth.
-
Do Not Move It to a Much Larger Pot
A larger pot holds more soil, which can stay wet for longer. If you need to repot, choose a container of a similar size or slightly smaller, with good drainage.
-
Do Not Place It in Harsh Direct Sunlight
A stressed plant may struggle in strong afternoon sun. Keep it in a bright, sheltered spot with indirect light while it recovers.
-
Do Not Water on a Fixed Schedule
During the monsoon, many plants receive enough water from rainfall alone. Always check the soil before watering. If the soil feels moist about 5 cm below the surface, wait before adding more water.
-
Do Not Leave Damaged Leaves on the Plant
Remove yellow, dead, or unhealthy leaves. They can attract pests, encourage fungal problems, and use energy that the plant needs for recovery.
Keep Your Monsoon Garden Healthy with Urvann
Waterlogged soil can quickly damage healthy plants during the monsoon, but early action can often save them. By improving drainage, reducing excess moisture, and monitoring your plants closely, you can prevent root rot and keep your balcony or garden thriving throughout the rainy season.
Are you looking to add more resilient plants to your collection?
If yes, explore Urvann's wide range of indoor and outdoor plants, gardening essentials, and expert plant care resources to help your garden flourish in every season.
Frequently Asked Questions (FAQs)
1. Can I save a plant that has been waterlogged for 3 days?
It depends on the plant and how much root damage has occurred. Succulents and cacti are often difficult to save after 2–3 days of heavy waterlogging because their roots are very sensitive to excess moisture.
Hardier plants such as money plant, croton, and many flowering plants can often recover if treated quickly. Check the stem near the soil line. If it is still firm and green, the plant still has a good chance of recovery.
Remove damaged roots, repot into fresh well-draining soil, and keep the plant in a bright, sheltered spot. Avoid watering until the soil begins to dry, then monitor the plant for the next 10–14 days.
2. My pot has drainage holes, but the soil still stays wet for days. Why?
This usually happens for one of three reasons:
- The soil mix is too heavy and drains poorly.
- The pot is sitting flat on the ground, blocking drainage.
- Roots or debris are partially blocking the drainage hole.
Use a lighter potting mix, raise the pot on a stand or bricks, and check that the drainage holes are clear.
3. Are grow bags really better for the monsoon?
In most cases, yes. Grow bags allow excess moisture to escape through the fabric, helping the soil dry faster after heavy rain.
They may need more frequent watering during hot summer months, but during the monsoon, this improved drainage helps reduce the risk of waterlogging. The key is to adjust your watering based on the season.
4. Should I use polythene bags or normal grow bags?
Polythene bags trap moisture completely and have very limited drainage. They are essentially sealed containers. They are fine for propagation and temporary use in nurseries, but for growing plants long-term on a balcony or terrace, especially during the monsoon, breathable fabric grow bags significantly outperform polythene. The 260 GSM UV-stabilised fabric used in KIVO grow bags is designed to handle outdoor conditions, including direct rain, without degrading.
5. Can I reuse soil that was waterlogged?
Yes, with conditions. Remove the old soil, spread it on a newspaper in a shaded area, and allow it to dry completely for 3–5 days. Mix in fresh vermicompost (20% by volume) and coarse sand or perlite (15% by volume) before reusing it. Do not reuse soil that smells strongly of sulphur after drying. The anaerobic bacteria population is too high and will create problems for new roots.
6. When should I start watering again after a waterlogging episode?
Wait until the top few centimetres of soil feel dry. During the monsoon, many recovering plants may not need watering for one to two weeks. Before watering, check that the soil is dry below the surface and that the pot feels lighter than usual. Water only when the plant actually needs it, not on a fixed schedule.